There are many accounts for the origin of Valentine’s Day. One belief is that the day honours several martyred saints named Valentine during Rome's third century.
It is rumoured that each St. Valentine worked tirelessly against the rule of keeping single men unwed so that they'd make more focused soldiers by secretly marrying them to their betrothed.
Over time, Valentine's Day has become commercialized, traditionally involving flowers, chocolates, and a romantic dinner. The desire has remained a constant; pursuit of love or a rekindling of romance.
Chocolate has been an indulgence associated with a reward, around acknowledgements or a joyous event.
Studies provide evidence that we enjoy this luxe treat due to the all-over mouthfeel created by the creamy fats, combined with the addictive ingredients dopamine, phenylethylamine, caffeine and anandamide, which aids in producing a sensation of joy associated when eating chocolate.
Maybe you’d like to show off your skills as a chocolatier and gift someone special some cocoa delights this Valentine’s Day?
When you see the results of this recipe, you might keep them for yourself. It’s alright if you do. Aren’t you worth it?
After all, Valentine’s Day is about love. So don’t forget to love yourself.
Not a fan of brandy? This simple recipe allows you to customize the fillings. The moulds can be found at any retailer that sells baking supplies, like Amazon starting at $14 or Michaels for $8.99. Bulk Barn offers a variety of chocolate. This recipe uses semi-sweet chocolate.
Note: The chocolate needs to be tempered to set up or harden in the moulds. The process intimidates people. There are three methods to achieve tempering. The recipe in this article illustrates the most straightforward approach.
Chocolate Ganache with Brandy Filled Valentine Bonbon Recipe
PREPARATION TIME 30 min YIELDS 24 pcs
Equipment
(4) 6 piece mini chocolate silicone moulds, 2 heat-resistant plastic measuring cups, heat-resistant spatula, knife, cutting board, teaspoon, candy thermometer, small bowl, large bowl, 2 large piping bags, (2) #1A piping tip, one of; a palette knife, icing scraper or bench scraper
Ingredients
Shell
2 cups of semi-sweet chocolate baking bars, finely chopped
Gold edible lustre dust
Brandied Ganache
½ cup semi-sweet chocolate chips
¼ cup heavy cream
2 Tbsp brandy
Instructions
Step 1
Sprinkle the gold lustre dust into each mould sparingly. A tiny tap of dust makes a big impact on the end result.
Step 2
In a heat-resistant measuring cup, heat the heavy cream in the microwave, watching that it doesn’t boil over. Pour the hot cream over the semi-sweet chocolate chips. Allow the mixture to sit for 1 minute, then stir until smooth. Incorporate the brandy and transfer the ganache into a prepared piping bag. Set aside.
Step 3
Pour finely chopped chocolate into a heat-resistant plastic measuring cup. Glass will hold the heat longer, potentially increasing the heat. Heated chocolate in a glass container will also take longer to cool to the desired temperature.
Heat in the microwave for 30 seconds, stir and microwave for 30 seconds, stir and microwave for 15 seconds, and then microwave for 10 seconds. After the final 10 seconds in the microwave, stir the chocolate until it’s entirely smooth.
If there are pieces that still haven’t melted after an aggressive stir, first check that the temperature of the chocolate hasn’t gone above 90℉, then microwave for five more seconds. Stir aggressively once more. Check that the temperature is still below 90℉.
If the temperature has gone above 90℉, add ½ cup of additional chocolate pieces and aggressively mix them in to lower the temperature and return the chocolate to a tempered state.
Step 4
Fill each mould to the top with tempered chocolate using a prepared piping bag. Allow the moulds to sit for 1 minute, then invert the moulds over a large bowl, allowing the centres to drizzle out, catching the discarded chocolate for future use.
Step 5
Turn the moulds over, and pipe each cavity with ganache. Do not fill to the top.
Use the piping bag with remaining tempered chocolate to cover the top of each bonbon completely, sealing in the filling.
Give the moulds a light tap on a surface to eliminate bubbles.
Scrape and clean up the top of each mould for a smooth finish to the bottom of the bonbon.
Step 6
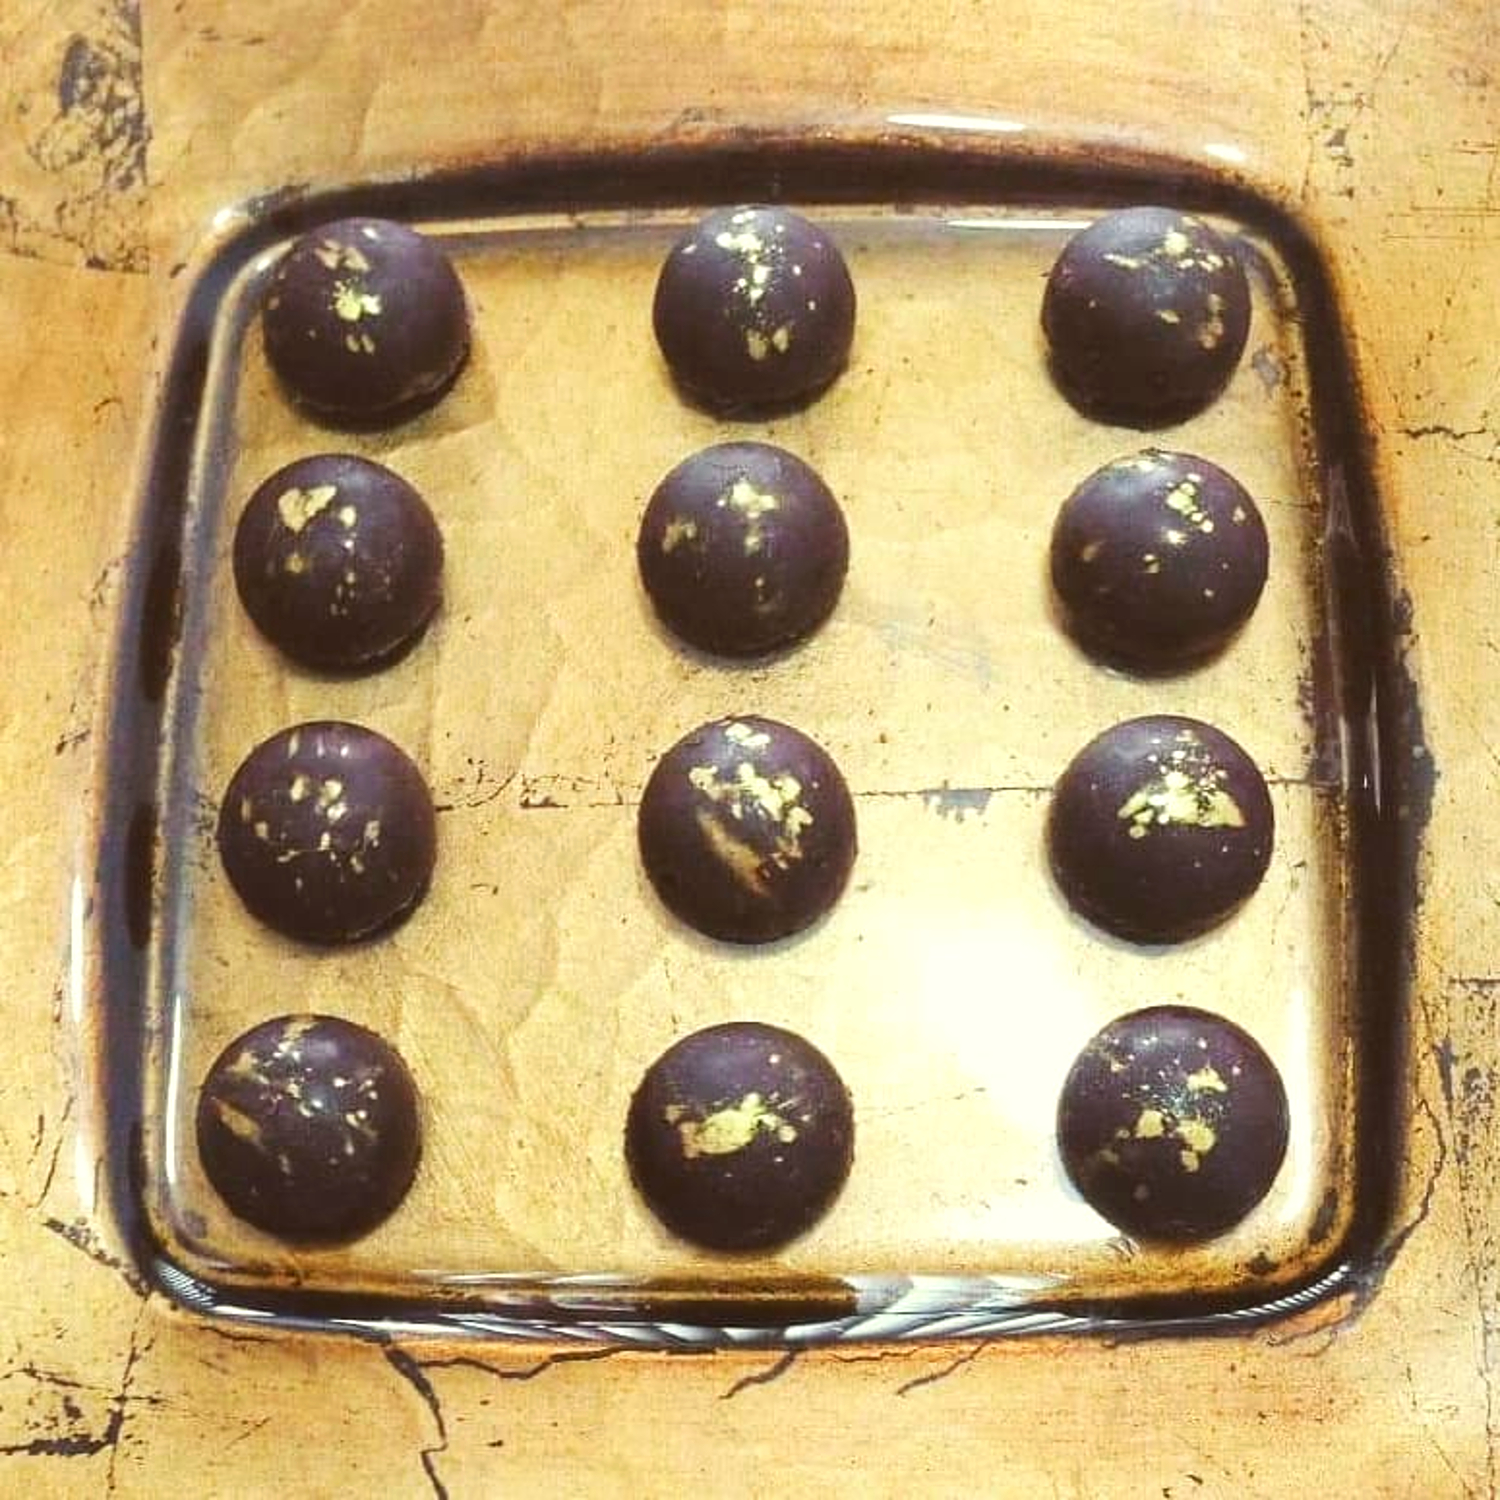
Refrigerate the moulds for approximately 10 minutes. Give the mould a light tap on a surface to help liberate the chocolate. Place a piece of parchment on a clean surface and carefully invert the moulds, releasing the bonbons onto the paper.
Voila! Each one is different and stunning. Bon appetit!