Krow·kuhm·boosh - The name comes from the French phrase Croque en bouche, meaning crunch in the mouth. This is an elegant dessert made up of filled profiteroles in a pleasing display.
The translation for the choux in the dough that makes the profiterole is cabbage, describing the pastry’s cracked, uneven surface.
The original profiterole recipe originated in the 1500s and was the invention of an Italian chef named Panterelli. When Catherine de Medici of Italy married King Henry II of France, the Queen made sure to bring her chefs.
For centuries, profiteroles weren’t exactly prepared the way we’re familiar with today. For that, we can thank Chef Antonin Carême, who is highly regarded as one of the most influential French chefs in history.
Among many other contributions to French cuisine, Carême popularized profiteroles in the 19th century by adding a cream filling and warm caramel topping then took the construct of the dessert a step further by towering the profiteroles atop one another into what would become a wedding favourite, the croquembouche.
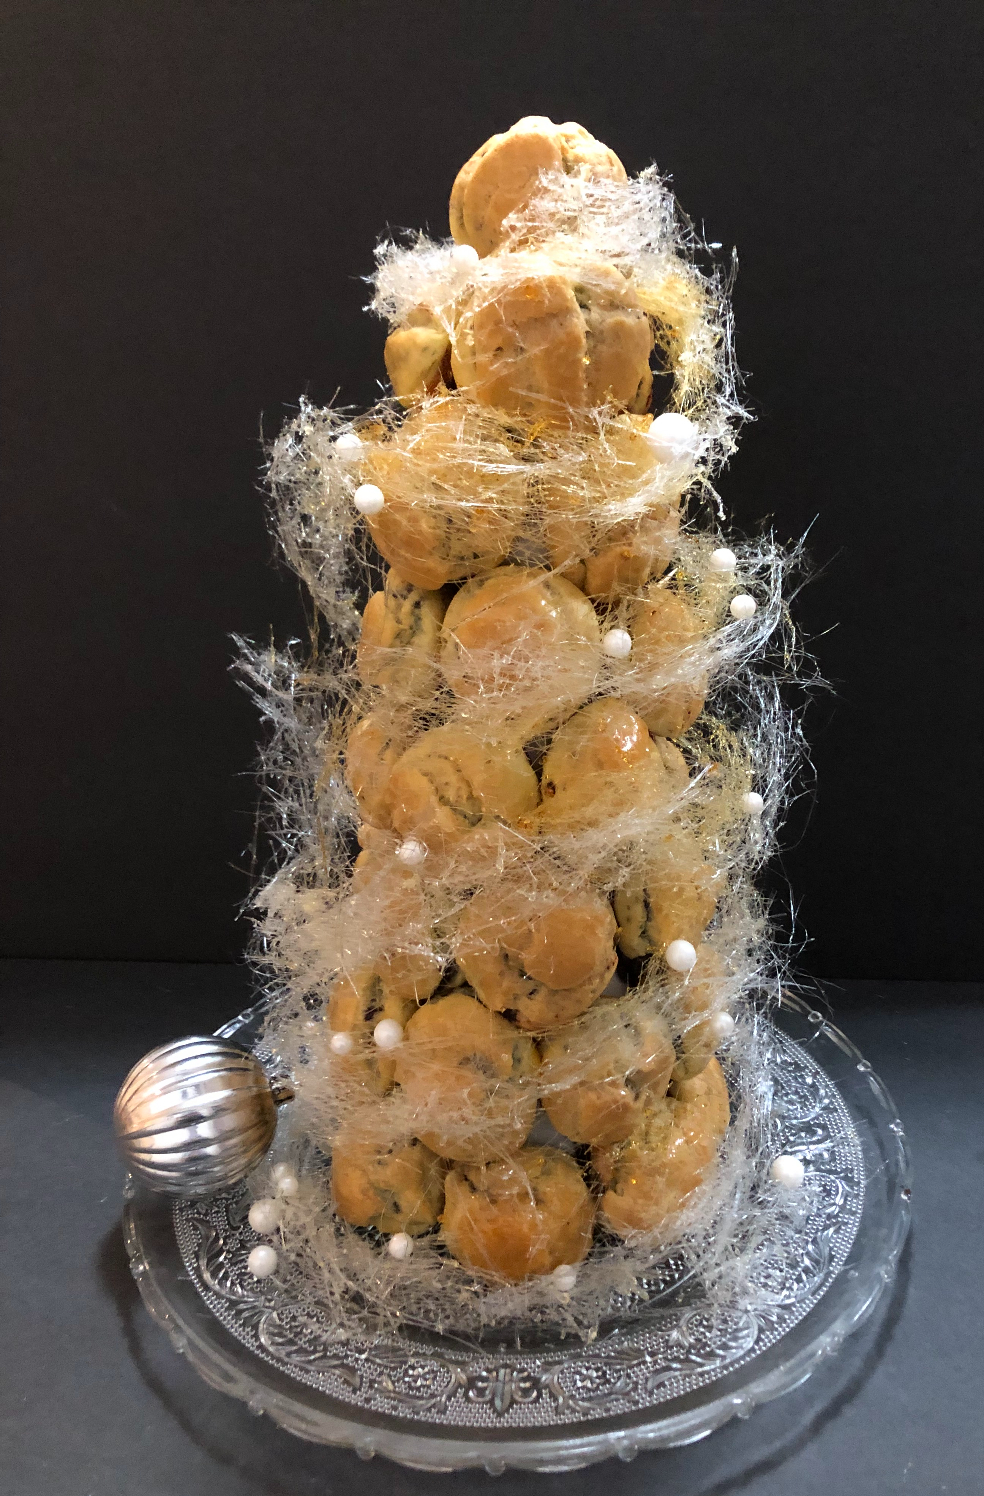
The traditional decoration for a croquembouche is a spun sugar glaze dusted with candied almonds. Some bakers drizzle chocolate over the croquembouche or add more exotic ingredients like candied flowers.
The top of the croquembouche may be adorned with ribbons and other ornaments. Each profiterole is attached with caramel. The result is very crunchy, which explains the name.
One of the biggest challenges with a croquembouche for guests unfamiliar with this food is eating it successfully. Historically, the croquembouche was cracked open with a heavy knife or sword, and guests picked away the profiteroles. In the modern era, the guests may be encouraged to carefully pull the croquembouche apart with napkins in hand.
The recipe attached offers a delightful spin with dark chocolate ganache-filled profiteroles for a heavenly bite after bite.
Croquembouche Recipe
PREPARATION TIME 2 hrs YIELDS 40 profiteroles
Equipment
2 silicone mats with printed circles, spatula, medium saucepan, teaspoon, tablespoon, baking sheet, heat-resistant bowl, measuring cup, piping bag, #1A tip, #230 tip, parchment paper, 12-inch x 4-inch styrofoam cone, tape, small mixing bowl, whisk, toothpick, fork, silicone baking gloves (optional)
Ingredients
Choux Pastry
1 ⅓ cup water
⅔ cup butter
¾ cup flour
4 large eggs
½ tsp vanilla
Chocolate Ganache
4 cups dark chocolate chips
2 cups cream
Caramel
2 cups sugar
½ cup water
Spun Sugar
2 cups sugar
½ cup water
Candied pearls
Instructions
Step 1 - Choux Pastry
Preheat the oven to 375°F. Over medium-high heat, add water and butter to a small saucepan. When the mixture begins to boil, remove the pan from the heat and add the flour. With a spatula, stir vigorously to form a dough.
Return the saucepan to medium heat and cook the dough for 1 to 3 minutes, stirring, until the dough pulls away from the sides of the pan. Remove from heat and cool for 3 minutes.
Step 2
Add vanilla and whisk while adding the eggs, one at a time, until lightly beaten. The correct consistency is achieved when the dough becomes glossy and pipeable.
Step 3
Prepare a baking tray with the silicone sheet and a piping bag with the 1A tip; spoon the dough into the piping bag. Pipe each circle, starting at the centre, until the dough reaches the edge of each circle. With a damp finger, flatten any points.
Bake for 30 to 40 minutes or until the choux pastry shells are golden brown. It is important not to open the oven door to check the pastries until you have reached the 25-minute mark.
In the last 5 to 10 minutes of baking, prick each shell with a toothpick to allow the profiteroles to dry out in the oven while baking. Let cool completely before filling.
Step 4 - Chocolate Ganache
In a heat-resistant bowl, microwave the chocolate chips and cream for 1 minute. Stir and turn it on for another 15 seconds. Stir and repeat for 15 seconds again and again until the mixture is completely smooth; stirring after each additional 15 seconds. Allow the ganache to cool down by chilling for approximately 30 minutes.
Prepare the piping bag with a #230 tip. Spoon the ganache into the prepared bag.
Step 5
Place parchment paper down on a clean surface, a large enough working surface for your filled profiteroles.
With completely cooled profiteroles, press the end of the tip gently into the back of each profiterole and fill just until the ganache attempts to overflow. Set them with the opening side up while filling all of them, allowing the ganache to set. When the filling is complete, turn them over so as not to crush the tops that will be seen.
Step 6 - Structure Preparation
Prepare the styrofoam cone by taping parchment paper securely around the cone. Parchment paper is preferred. The caramel is too hot for wax paper.
Step 7 - Spun Sugar
In a saucepan, add the sugar and water over high heat for 5 to 7 minutes, without stirring, until a light golden colour is achieved. Immediately remove the pan from heat. The caramel continues to darken slightly.
Step 8 - Assembly
Place a smear of caramel in the centre of your serving dish to secure the cone in place.
Working quickly, dip the back and bottom of the filled profiteroles into the caramel, one at a time, and arrange, starting from the bottom in a circular pattern, onto the styrofoam cone. If you don’t have silicone gloves, try to avoid touching the hot caramel. It will burn your fingertips instantly.
Step 9 - Spun Sugar
Note that this next step should be completed just before serving this dessert. The spun sugar will begin to melt after a few hours, based on the room’s temperature.
In a saucepan, prepare the second batch of caramel. Place a long piece of parchment paper on a clean surface. This is the messy bit. Allow the caramel to cool until the consistency of the drips from a fork begin to turn into strands.
Dip a fork into the caramel and wave it swiftly back and forth across the length of the parchment piece. Strands will lay themselves out on the paper. Continue four or five times, then gently gather a mass and place it on your croquembouche. Repeat as many times to achieve the desired effect.
Carefully set decorative items onto the spun sugar.
Your croquembouche is complete and almost too pretty to eat! Enjoy!